In this post I’ll show how to install Pivotal’s CF on vSphere. For more information on Pivotal’s CF see http://www.gopivotal.com/paas
You can download the deployment appliance at https://network.gopivotal.com/
After you download the appliance (OVA), deploy it into your vSphere environment. I deployed mine into my management cluster. The deployment process is straight forward and similar to most OVA/OVF deployments where you select the IP information, admin password, etc. There is an issue with the current appliance where if there is a DHCP server on your network, the appliance’s network interface will pick up a DHCP address even if you have provided a static IP during the deployment. This can be resolved by rebooting the appliance. It will not pick up a DHCP address again after the reboot. After the appliance has been deployed, access it via a web browser and log in.
Initial Setup

Once you log in you should see

Select vSphere. The first category selected will be vCenter credentials.

Enter your information, save and select vSphere configuration.

Network name is the portgroup where the Pivotal CF VMs will be placed. The rest of the fields should be self-explanatory. Save and select Network configuration.

The information provided here will be used by your Pivotal CF VMs. Select NTP servers when you’re finished.

Lastly, select Resource sizes and Install. You should the following screen.

In vCenter you will see a few VMs being created. The powered on VM should be your Micro BOSH VM.

If everything goes well, you will see

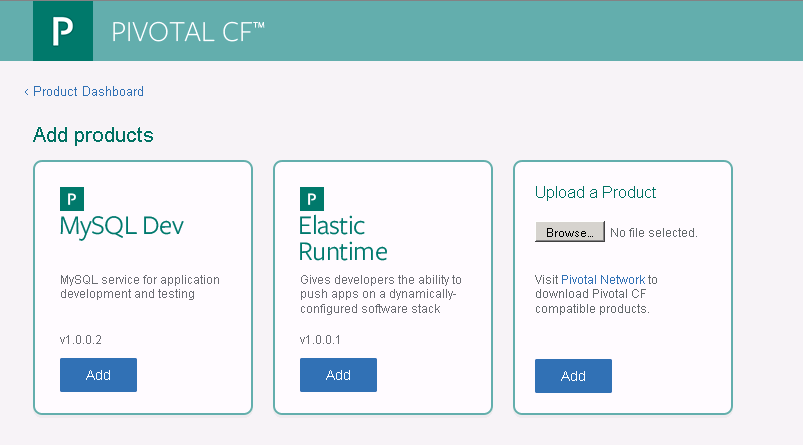
Install Elastic Runtime
Go back to the Product Dashboard, select Add Product and Add on Elastic Runtime.
Select HA Proxy, fill in the HA Proxy IP and Generate Self-Signed RSA Certificate.

For the HAProxy IP, enter the third IP after your reserved IP range. If you receive a message that the HAProxy IP is already in use, try the next IP. I believe two IPs are used by Pivotal CF after your reserved IP range so the third one should work. Select Save and Cloud Controller.

In my lab I created a sub-domain named cf.vmware.local.
Important
You need to create a wildcard record that points to your HAProxy, Cloud Controller or load balancer IP. Since I didn’t fill in any info for the Cloud Controller and am not using a load balancer, I created a wildcard record that pointed to my HAProxy IP as such: *.cf.vmware.local > 192.168.70.53
If you don’t have the ability to modify DNS records in your environment, look at using xip.io.
Save and select SAML login.

For my environment the SSO URL was https://vc5c.vmware.local:7444/ims/STSService
Select Web Consoles and Resource sizes and make any changes needed. The only change I made on Resources sizes was to set the DEA’s RAM to 8192 because of resource restrictions in my lab.
Select Install Updates when you’re ready. You may receive a warning that you don’t have the required amount of CPU cores. Press ignore to proceed.
The install process should take less than an hour and you will see a lot of activity in your specified vCenter resource pool. VMs will be repeatedly cloned, powered on and off, etc. Eventually you should see

Download the cf client
Now we need to download the cf client. First, we need to get the credentials to login to the Pivotal CF management portal. Go to Elastic Runtime > Credentials and grab the UAA administrator user username/password.

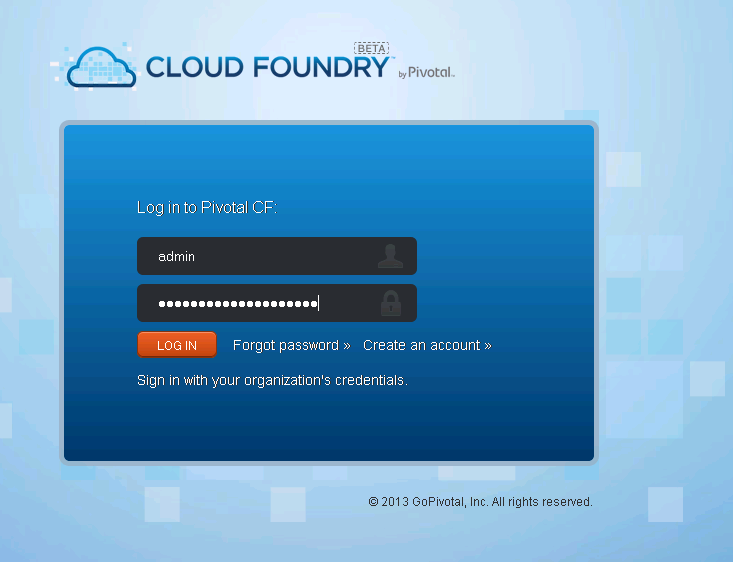
Connect to the Pivotal CF management portal via a browser. The address should be something like https://console.cf.vmware.local. Enter the UAA user credentials.
Select Tools on the navigation menu.

Download the CF CLI for your OS.
I was also able to install the cf client on a Ubuntu machine by running “sudo gem install cf”
Connect to the Pivotal CF instance
Once you have the client installed, can connect to your Pivotal CF instance.
cf target https://api.cf.vmware.local
cf login admin (UAA password used to log into the web portal)
Select 1 to go back to a command prompt.
Create VMware organization
cf create-org vmware
Create user chris@vmware.local in the VMware oganization
cf create-user chris@vmware.local -o vmware
Setting permissions for the new user
Go back to the web management portal and select Users > Org Roles > Development Roles. Initially it will look like

Select everything for the new user

Logout as admin and log back in as the newly created user.
Go back to the cf client.
cf logout
cf target api.cf.vmware.local -o vmware -s development
cf login chris@vmware.local
Select 1 for Development
Authenticating… OK
1: development
2: production
3: staging
Space> 1
Switching to space development… OK
Push sample app to Pivotal CF
git clone https://github.com/andypiper/sinatra-static-web.git
cd sinatra-static-web/
chris@dev:~/cf/sinatra-static-web$ cf push
Name> firstapp
Instances> 1
1: 128M
2: 256M
3: 512M
4: 1G
Memory Limit> 256M
Creating firstapp… OK
1: firstapp
2: none
Subdomain> firstapp
1: cf.vmware.local
2: none
Domain> cf.vmware.local
Creating route firstapp.cf.vmware.local… OK
Binding firstapp.cf.vmware.local to firstapp… OK
Create services for application?> n
Save configuration?> n
Uploading firstapp… OK
Preparing to start firstapp… OK
—–> Downloaded app package (216K)
—–> Using Ruby version: ruby-1.9.3
—–> Installing dependencies using Bundler version 1.3.2
Running: bundle install –without development:test –path vendor/bundle –binstubs vendor/bundle/bin –deployment
Fetching gem metadata from https://rubygems.org/……….
—–> Downloaded app package (216K)
—–> Using Ruby version: ruby-1.9.3
—–> Installing dependencies using Bundler version 1.3.2
Running: bundle install –without development:test –path vendor/bundle –binstubs vendor/bundle/bin –deployment
Fetching gem metadata from https://rubygems.org/……….
dler cache.
—–> WARNINGS:
You have not declared a Ruby version in your Gemfile.
To set your Ruby version add this line to your Gemfile:”
ruby ‘1.9.3’”
# See https://devcenter.heroku.com/articles/ruby-versions for more information.”
—–> Uploading droplet (24M)
Checking status of app ‘firstapp’…
1 of 1 instances running (1 running)
Push successful! App ‘firstapp’ available at firstapp.cf.vmware.local
chris@dev:~/cf/sinatra-static-web$
Access the new app
Open a web browser and go to http://firstapp.cf.vmware.local


Hi, sorry for asking trivial question, how and where did you add this dns entry?
*.cf.vmware.local > 192.168.70.53
Thanks in advance
I have a little Windows 2003 VM in my lab that I use at my domain controller, DNS, etc and that’s where I created the DNS records. I created an A record that pointed to 192.168.70.53 and a CNAME pointing to *.cf.vmware.local. This makes it so that anything at cf.vmware.local resolves to the same IP address (192.168.70.53). For example, whatever.cf.vmware.local points to 192.168.70.53. This was required because all the CF apps would have names like app1.cf.vmware.local, myapp.cf.vmware.local, etc and need to resolve to the same IP. I believe Ruby on Rails routes would then direct the user to the correct application. Here is a screenshot:
We didn’t move forward with CF and I tore my environment down ages ago and don’t remember too much about it. If you don’t a DNS server that you can create records on, you may want to check out http://xip.io/ Hope that helps.