Overview
This post will be the first part in a series on how to configure vCenter Orchestrator (vCO) to integrate with vCloud Director’s blocking tasks via RabbitMQ. I’ll also try to cover some use cases that don’t involve vCloud Director and show how vCO can monitor RabbitMQ queues and execute vCO workflows. Actually, most of this will revolve around vCO and RabbitMQ.
I’m not going to cover how to install vCO, but I’ll cover how to configure certain parts. My testing was done with vCO 5.5.2, which can be downloaded at https://my.vmware.com/group/vmware/details?downloadGroup=VCL-VCOVA_552&productId=408&rPId=5635. If you need help deploying vCO, you can see how to deploy an OVF/OVA at https://www.youtube.com/watch?v=uBXU8CBTKBk. You can probably use the vCO that comes with vCenter, but I haven’t went that route in a while. vCenter and the ESXi hosts are at 5.5 U2. vCloud is at 5.5.2.2.
Installing RabbitMQ
I’ll be using the Windows version of RabbitMQ and will be installing it on my vCenter server that is running on Windows 2008 R2. RabbitMQ can be downloaded at http://www.rabbitmq.com/install-windows.html. I’m using the current version, which is 3.3.5 at this time. When you start the installation you’ll be notified that you need to install Erlang and the installer will direct you to the Erlang download site:
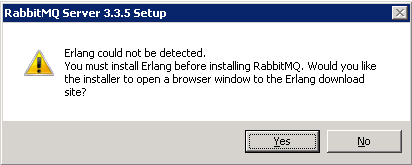
I installed version 17.3 of Erlang: http://www.erlang.org/download/otp_win64_17.3.exe. You can now re-run the RabbitMQ installer. Of course, you can install Erlang first and then run the RabbitMQ installer and you will not receive this message.
Configuring RabbitMQ
The first thing we need to do is enable the Web UI for RabbitMQ. You don’t have to do this if you’re comfortable with doing all of the management from the command line. Go to Start > All Programs > RabbitMQ Server > RabbitMQ Command Prompt (sbin dir). At the command line run the command rabbitmq-plugins enable rabbitmq_management
Now you’ll be able to access RabbitMQ’s management interface by going to http://localhost:15672/ from the machine where you installed RabbitMQ. The default credentials are guest/guest. With this version of RabbitMQ, by default you can only access the web interface using the guest account from the local machine. I’m sure you can create users from the command line and access the RabbitMQ service remotely, but I’m trying to keep it simple. We need to modify RabbitMQ’s conf file and then re-install it for the change to take effect. I’m not sure why this is the case. I found this out from http://www.mariuszwojcik.com/tag/rabbitmq-config/.
Open a command prompt and run copy %APPDATA%\RabbitMQ\rabbitmq.config.example to %APPDATA%\RabbitMQ\rabbitmq.config. Edit the new rabbitmq.config file and find this section (The %%s are comments).
%% The default “guest” user is only permitted to access the server
%% via a loopback interface (e.g. localhost).
%% {loopback_users, [<<“guest”>>]},
%%
%% Uncomment the following line if you want to allow access to the
%% guest user from anywhere on the network.
%% {loopback_users, []},
We want to change the last line to
{loopback_users, []},
Simply restarting the RabbitMQ service does not pick up the change. We need to re-install it. This is actually very easy to do. Simply go to Start > All Programs > RabbitMQ Server > RabbitMQ Service – (re)install
Configuring vCloud Director to talk to RabbitMQ
As a system admin in vCloud Director, go to the following section and fill in the highlighted areas. The Exchange, vHost and Prefix fields don’t matter for now. Once you’re done press Test AMQP Connection and it should succeed as long as the vCloud Director Cell can communicate to the AMQP host/port.

In the next post I’ll go over how to configure the RabbitMQ vCO and vCenter plug-ins.
