I’m going to show how you can provision Kubernetes clusters using vRealize Automation (vRA). I’ll be using kubeadm to install the Kubernetes cluster and since kubeadm is in beta at the time of this posting and doesn’t support HA kube masters, the Kubernetes clusters will be more useful for sandbox type environments.
You’ll be able to select how many Kubernetes worker nodes you want and it will support scale out operations for the worker nodes. Scale in operations are possible, but you’d have to add additional functionality to do this. Currently I don’t have a need for this so I haven’t looked into it. As it stands, you could perform scale in operations and manually remove the longer existing Kubernetes worker nodes.
Versions Used
- vRealize Automation 7.3 Enterprise
- CentOS 7.4 Minimal
- Kubernetes 1.6 – 1.9
Request Form
Here is what the request form looks like:
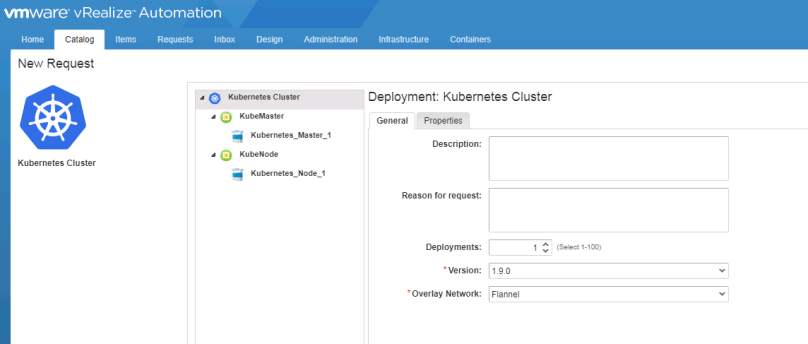
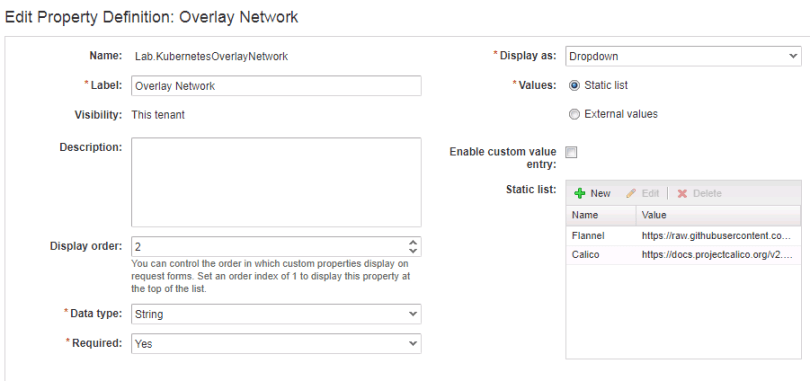
From here you’re able to select the Kubernetes version as well as what overlay network to use. Right now I’m just using Flannel and Calico for the overlay network options. Please see the kubeadm documentation for more information on kubeadm.
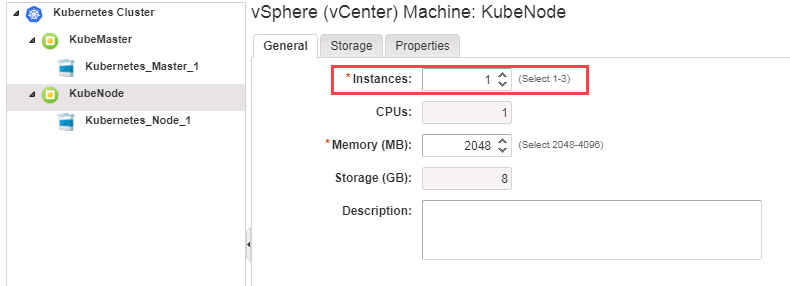
If you select the KubeNode entry, you can specify how may worker nodes you want:
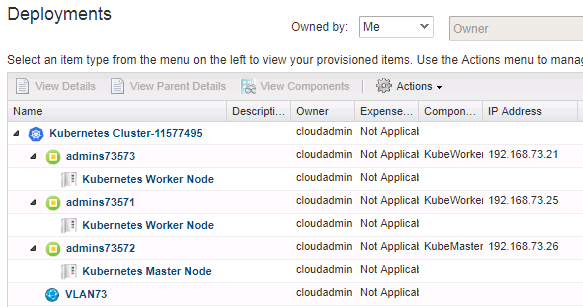
The Kubernetes clusters will look like this once deployed:

The Blueprint
The Kubernetes cluster blueprint is pretty basic:
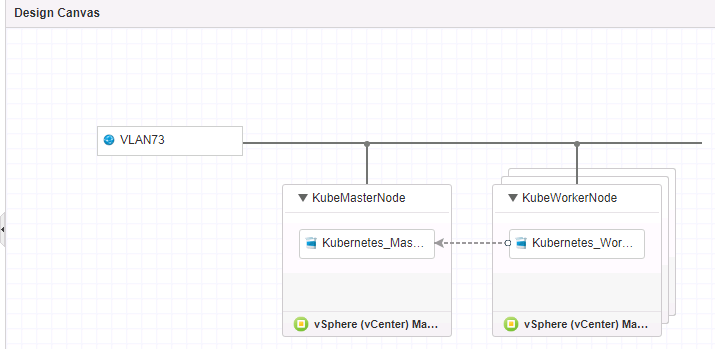
You can see the following:
- A network (VLAN73)
- A KubeMasterNode with a Kubernetes_MasterNode Software Component
- A KubeWorkerNode with a Kubernetes_WorkerNode Software Component
- A dependency between the two Software Components that says Kubernetes_WorkerNode is dependent on Kubernetes_MasterNode
If you’re not familiar with Software Components in vRA, they are blocks of code that run on your provisioned machines. The Kubernetes_MasterNode Software Component configures the Kubernetes master node and the Kubernetes_WorkerNode one configures the Kubernetes worker nodes. I won’t be covering the code here, but you can see it if you import the blueprint into your environment.
The Software Components have a single Custom Property that passes the Kubernetes Master’s IP address into the Software Components:

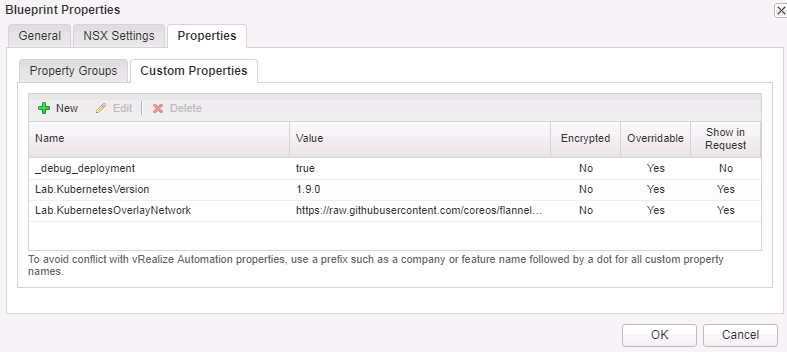
The blueprint itself has a few Custom Properties as well. The two below are actually Property Definitions that I’ll cover later. Here you can see:
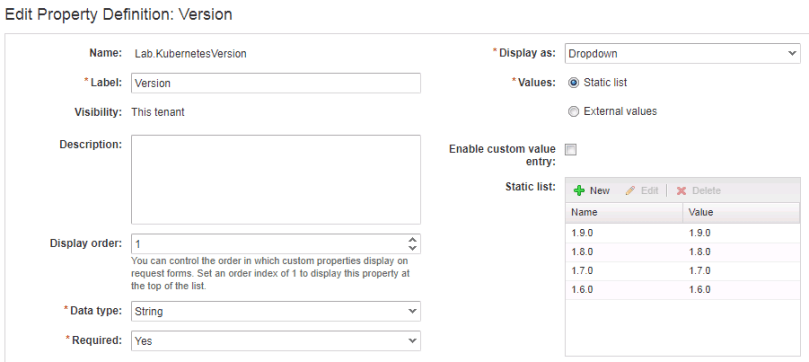
- Lab.KubernetesVersion: sets a default value of 1.9.0
- Lab.KubernetesOverlayNetwork: sets a default value to the URL for Flannel
Property Definitions
The Property Definitions that I’m using are static dropdown lists.
Kubernetes Version
Overlay Network
Scale Out
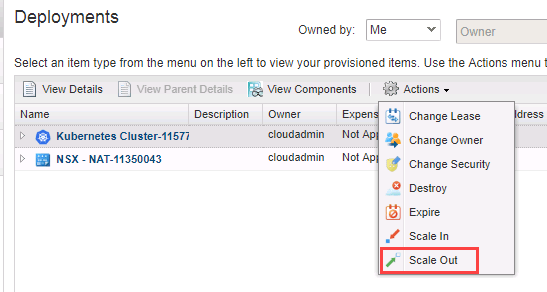
Let’s scale the cluster out by choosing Scale Out on the Kubernetes Cluster deployment:
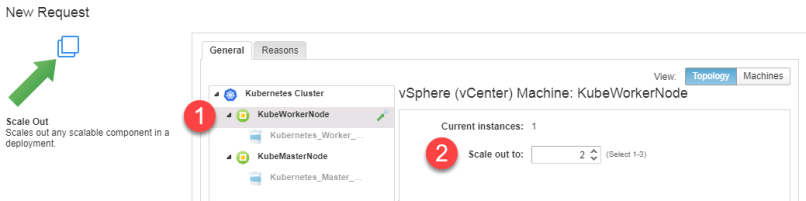
Select KubeWorkerNode, specify a worker node count and submit the request.
If the request is successful, we will see we now have three nodes (one master and two workers):
Running kubectl get nodes on the master also shows all three nodes:

Importing the blueprint
You can follow the instructions at vmtocloud on how to import the blueprint into your environment. Once imported, you’ll need to edit the blueprint to point to your network and a valid CentOS 7.4 template (other CentOS versions may work) in your environment. The blueprint can be found here.
