Overview
In a previous post I described how to configure vRealize Automation’s (vRA) built-in vRO. In this post I’ll show to install the vRO customizations on vRA. You may want to have a blueprint already created in vRA before proceeding.
vRA was previously known as vCloud Automation Center (vCAC).
vRO was previously known as vCenter Orchestrator (vRO).
Installing the vRO customizations
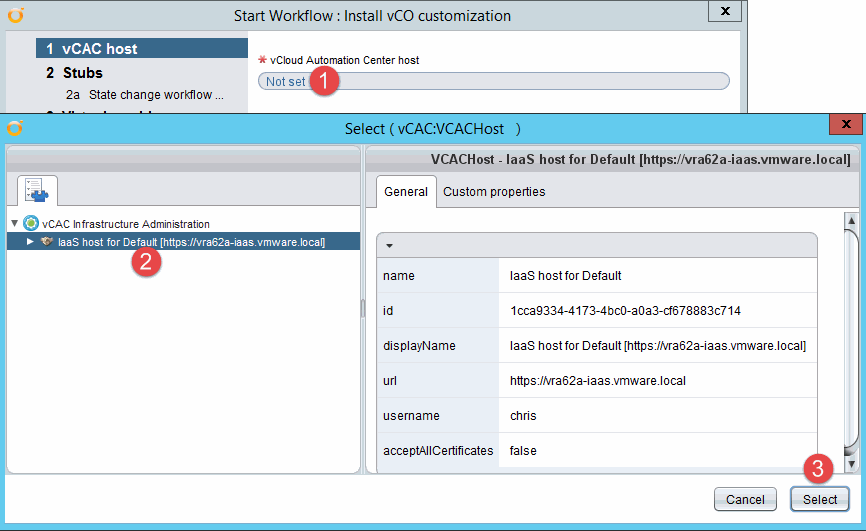
Launch the vRO client and browse to Library > vCloud Automation Center > Infrastructure Administration > Installation > and run the workflow “Install vCO customization”.
- Select “Not set”
- Browse to your vRA/vCAC host
- Confirm
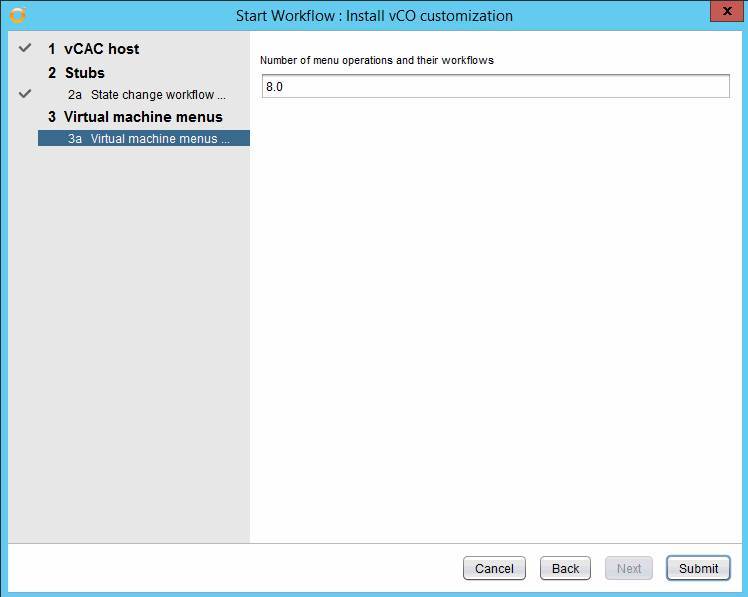
Select Next and we see all the workflow stubs that will be installed. What this allows us to do is configure any workflow we want to be ran during any of the following actions:
- Building Machine
- Machine Disposing
- Machine Expired
- Machine Provisioned
- Machine Registered
- Unprovision Machine
Let’s say we have a vRO provisioning workflow that we want to have ran each time a new VM is created. This workflow could do common tasks such as renaming the VM according to your naming standard, creating a computer account in AD, creating an entry into your IPAM software, creating tickets, etc. We will do some of these in a future post.
On the next screen we can specify how many menu operations we want to create. You can re-run the workflow and change this value if needed. I’ve specified 8 for now.
Submit the workflow and if everything goes okay, you’ll see the following:

Verifying that the customizations were installed in vRA
Open the vRA web UI, browse to any of your existing blueprints and edit it. Select the Actions tab and you’ll be able to see the newly installed vRO entries:
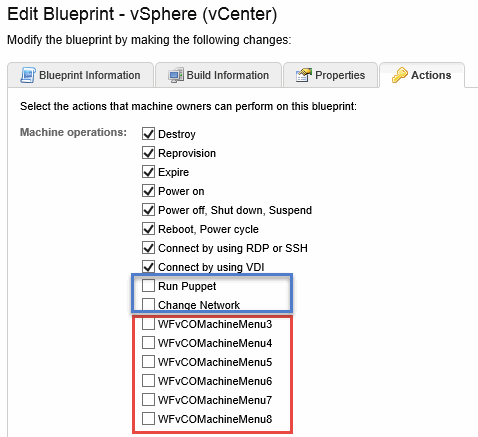
The items in blue were previously installed and renamed. The items in red are the new entries and what you can expect to see after you’ve installed the customizations for the first time. I’ll cover how to use these menu operations in a later post.
Adding a vRO endpoint
The last thing we need to do is to add a vRO endpoint. In the vRA web UI, go to Infrastructure > Endpoints > New Endpoint > Orchestration > vCenter Orchestrator. Fill in the following details:
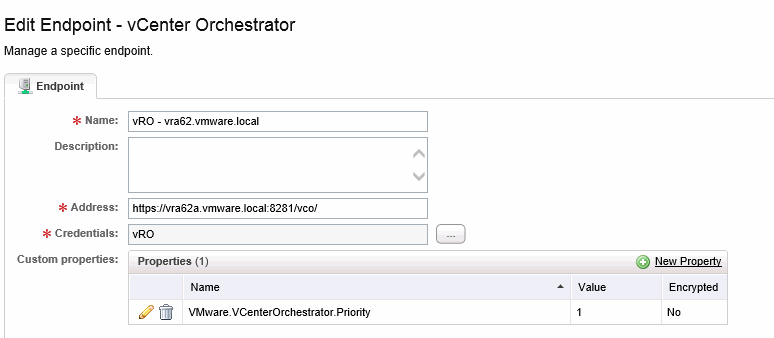
- Address: https://vra62a.vmware.local:8281/vco
- Credentials: Same as what you use to log into the vRO client with.
Lastly, we have to create a custom property with the following values:
- Name: VMware.VCenterOrchestrator.Priority
- Value: 1
Conclusion
In this post we installed vRO customizations into vRA that will allow us to call out to vRO and run workflows when certain actions take place within vRA. The vRO plug-in allows us to easily extend the functionality of vRA without resorting to what would normally be a complex process. In upcoming posts I’ll show how to run a vRO workflow while provisioning a new VM and how to create a custom menu action that will run a vRO workflow.
