Overview
This post is a continuation of part 1 where we installed and performed the initial setup of pfSense for use in a VMware home lab. In this post we will finish up by creating VLANs, firewall rules, NAT and verify connectivity.
VLAN Creation
In the first post we configured the LAN interface (em0) with an IP address of 192.168.20.1. Now we will create VLANs 20 & 21, create an additional interface on em0 and assign the VLANs.
Select Interfaces > Assign > VLANs and select the plus sign.
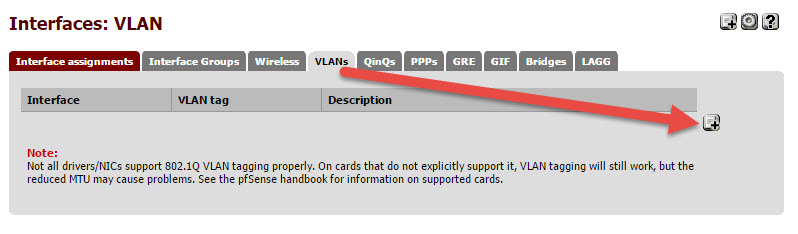
Make sure the parent interface is set to em0, set the VLAN tag to 20, provide a description and save:

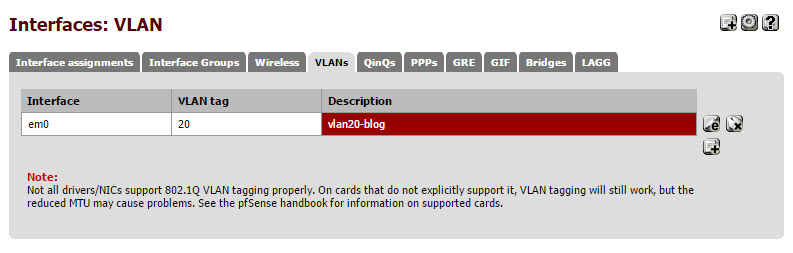
The VLAN should look like this:
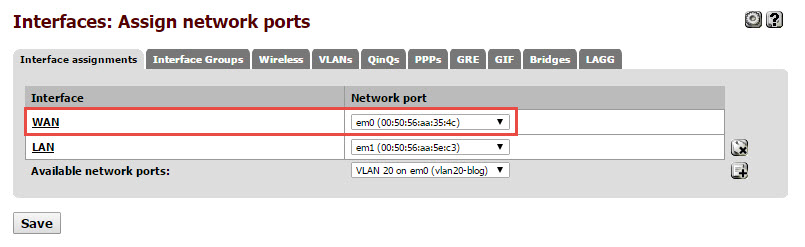
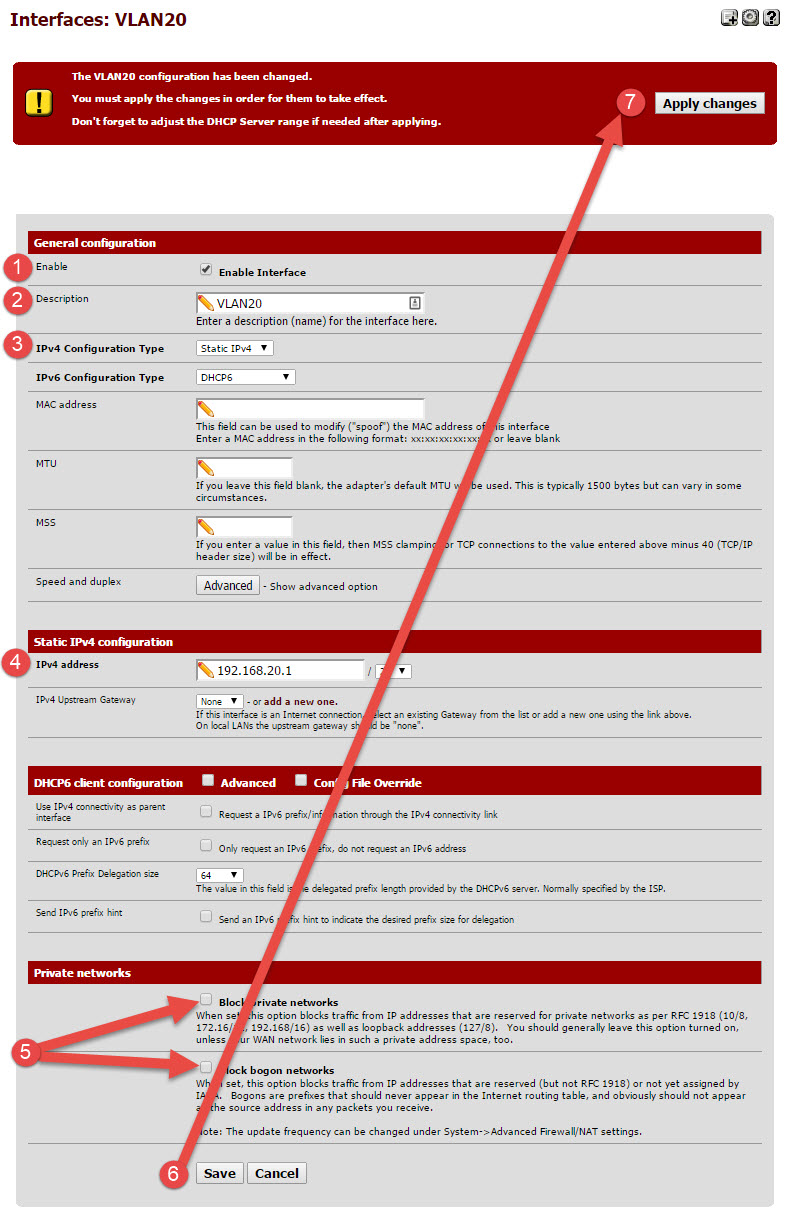
Select Interfaces > Assign > Interface assignments and set WAN to VLAN 20.
Select the WAN link under Interfaces and perform the following
- Enable the interface.
- Fill in the description.
- Change the IPv4 Configuration Type to Static IPv4.
- Verify the IP address.
- Uncheck to block private networks.
- Select Save.
- Select Apply changes.
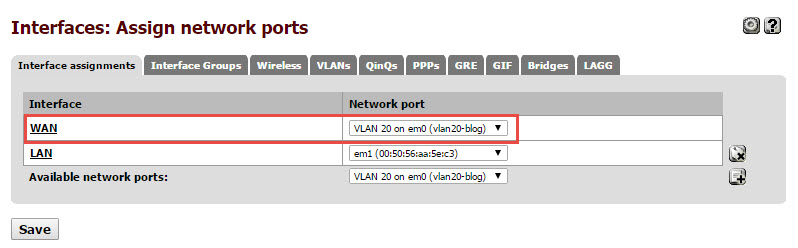
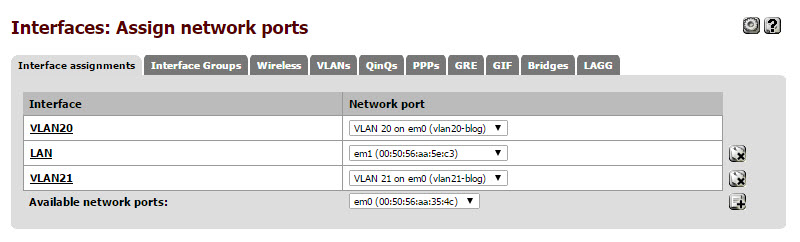
Interfaces > Assign > Interface assignments should now look like this:

Now we will create VLAN 21. It’s a little bit different from VLAN 20 because we will be creating a new interface that lives on em0. You can think of this as a sub interface. For each new VLAN you want to create, you will create a new sub interface on em0 and assign the VLAN to it. You can create additional em# devices by adding additional NICs to the VM in vCenter.
Select Interfaces > Assign > VLANs and select the plus sign and create VLAN 21 on em0.
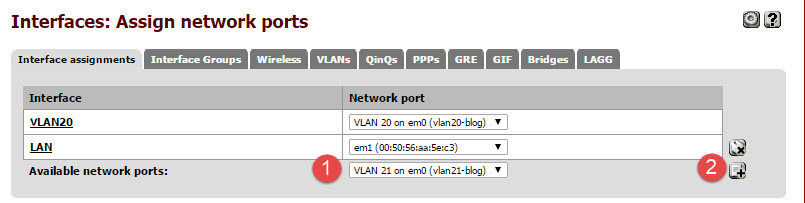
Select Interfaces > Assign > Interface assignments
- Change the Available network ports drop-down box to VLAN21.
- Press the add button.
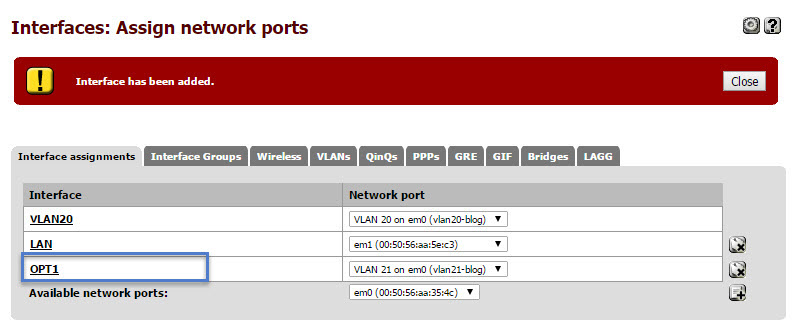
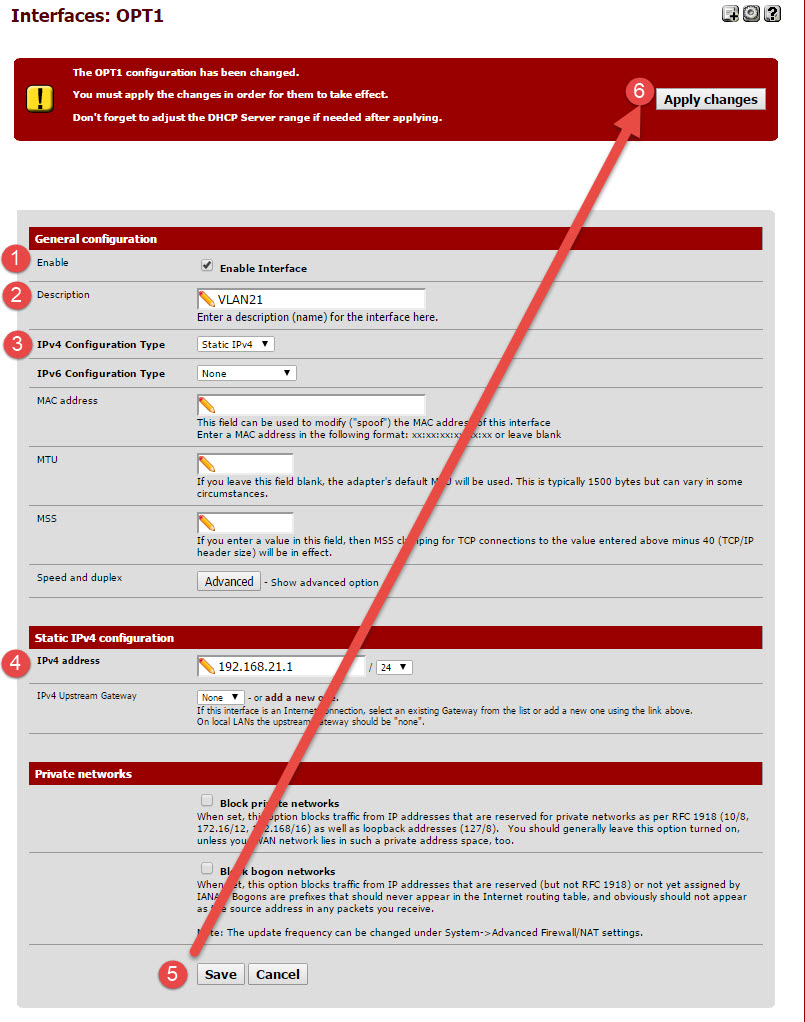
Select the OPT1 link under interfaces to configure it.
- Enable the interface.
- Provide a description.
- Change the IPv4 Configuration Type to Static IPv4.
- Set the IP of the interface. This will be the gateway off all of the VMs that connect to this network.
- Select Save.
- Apply changes
Interface assignments should look like this:
Firewall Rules
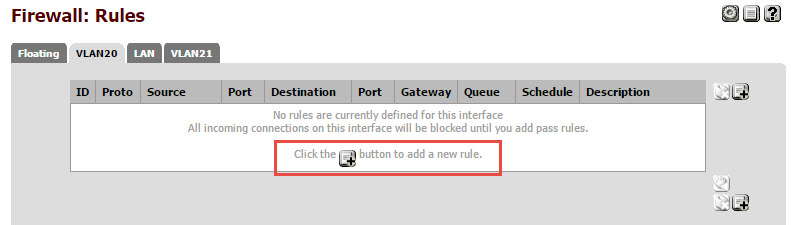
We need to establish some firewall rules in order for traffic to be allowed. For this demonstration I’ll just create a rule that allows all traffic, but you can modify the rule set as you see fit. If I’m working on an issue where I suspect a firewall is preventing functionality, I’ll jump into my lab, add a firewall rule to block specific traffic, verify functionality then back out the firewall change and verify again. Let’s work on VLAN20 first:
Go to Firewall > Rules > VLAN20:
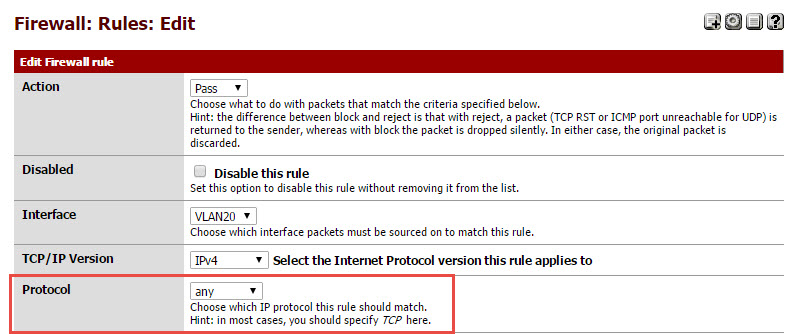
Set the action to Pass and the protocol to any:
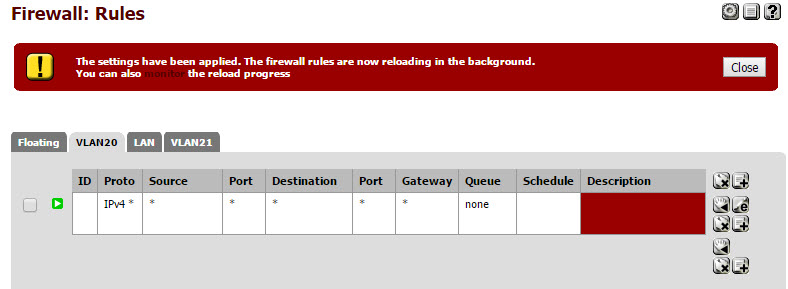
Save and apply changes. The firewall rules should look like this and all traffic will be allowed:
Do the same for VLAN21.
Testing Connectivity
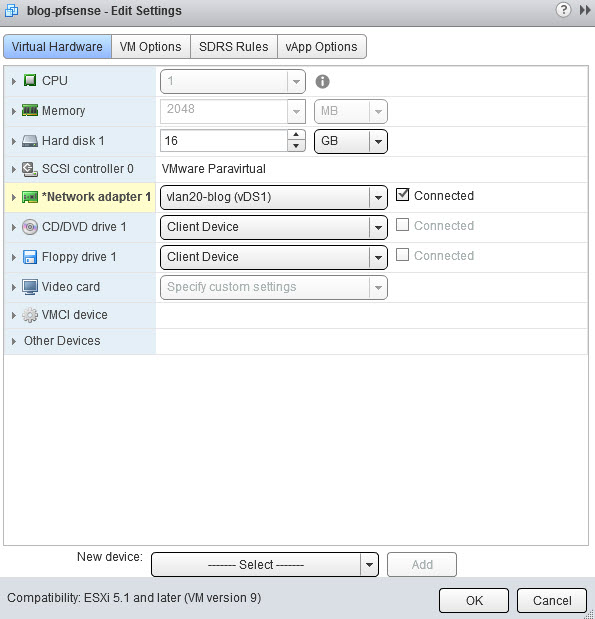
To test that everything is working correctly I created a VM and placed it on the vlan20-blog portgroup:
Once the VM is up and running we can do the following:
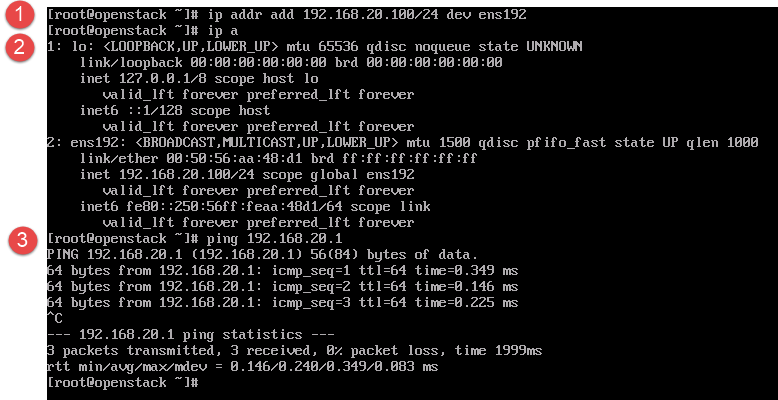
- Set a valid IP address on VLAN 20 (192.168.20.100)
- Verify the IP
- Ping the gateway, which is an interface on our pfSense VM:
You can then spin up another VM on VLAN 21 and verify connectivity between the two VMs. The VMs should be able to communicate within your network regardless of which ESXi host they are on. If they aren’t, one thing you want to make sure is that the switches that your ESXi hosts are on are trunking our VLANs (20-25).
If you need to add the default gateway, run:
ip route add default via 192.168.20.1
If you need to remove a previous default gateway, run:
ip route delete default via 192.168.3.1
My ESXi hosts are connected to a Cisco SG-300-10. Here is how I created the VLANs on it.
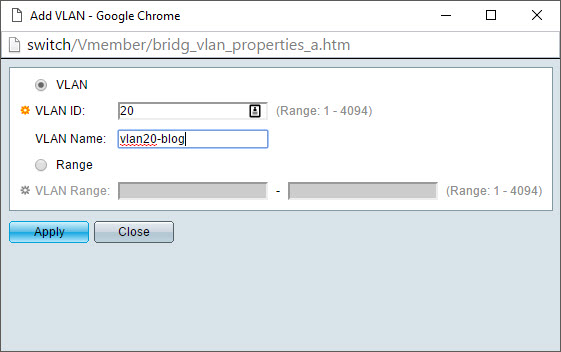
Go to VLAN Management > Create VLAN and enter:
- VLAN ID: 20
- VLAN Name: vlan20-blog
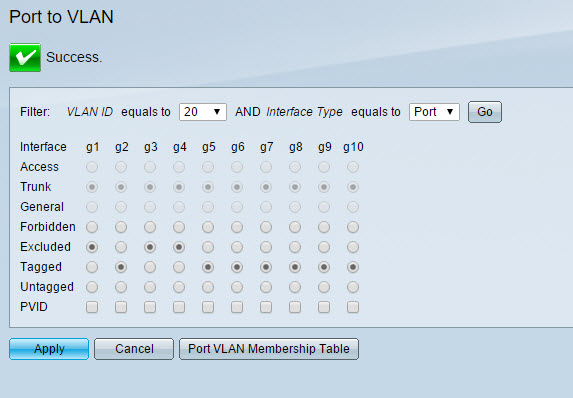
Go to VLAN Management > Port to VLAN and:
- Change VLAN ID equals to to 20 and press Go.
- Change each port that your ESXi hosts are connected to Tagged
- Press Apply
Do the same thing for VLAN 21.
Static routes and NAT
At this point your VMs should be able to communicate within your network. However, let’s say our VM has the IP address of 192.168.20.100 and tries to ping 192.168.1.1. When the request gets to 192.168.1.1, the request may be seen as coming from 192.168.20.100, which may be okay but 192.168.1.1 needs to know how to send the request back to 192.168.20.100. If it doesn’t have a route back to the 192.168.20.0/24 network, the request will fail.
We can either add a static route so that 192.168.1.1 will know how to reach VMs on the 192.168.20.0/24 network or create NAT rules so that requests coming from the 192.168.20.0/24 network will look like they are coming from the pfSense device (192.168.1.130) and since this is the same network as 192.168.1.1, it will be able to communicate with it.
On Windows, here is how we would add a static route to the 192.168.20.0/24 network via the pfSense device:
add 192.168.20.0 mask 255.255.255.0 192.168.1.130
This says that if you need to reach anything on the 192.168.20.0/24 network, talk to 192.168.1.130 and it will take care of it.
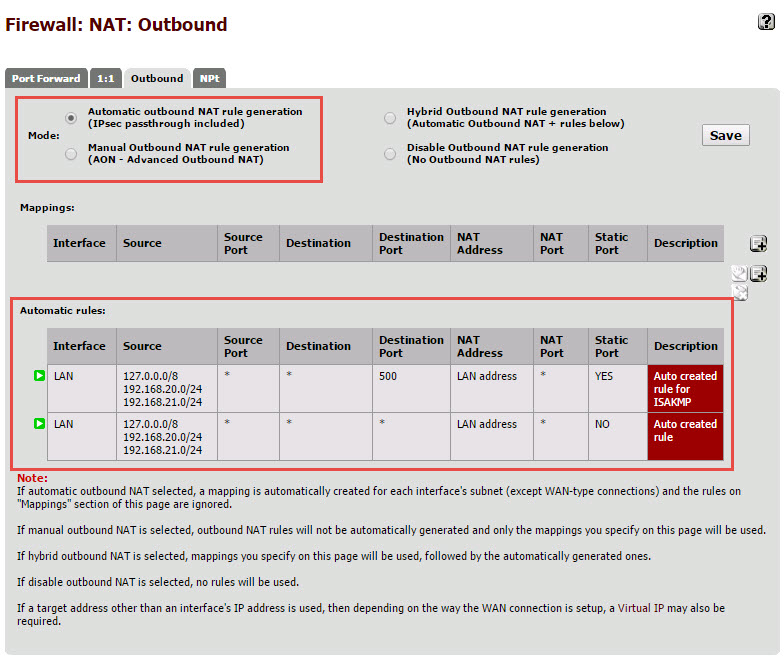
Let’s go to Firewall > NAT > Outbound and look at our NAT rules.
This section looks different than what I’m used to because I’m running and older version of pfSense.
We see that the NAT mode is set to automatic and in the automatic rules we see that there are rules in place for our 192.168.20.0/24 and 192.168.21.0/24 networks:
If I ping a VM with the IP of 192.168.1.4 on my local network from my 192.168.20.100 VM and view the traffic with tcpdump, I see:
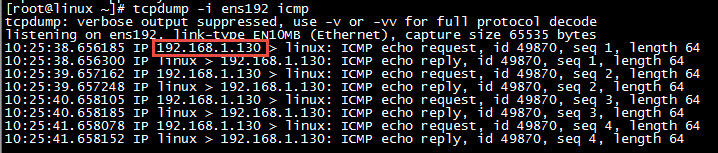
Here we see that the request is coming from 192.168.1.130, which is our pfSense device so we know the automatic NAT rules above are working.
Conclusion
If you look around the pfSense interface, you’ll see a lot of features that could be useful in a lab environment. It’s certainly been useful for me throughout the years. While I’m not a networking expert and didn’t intend to thoroughly cover things like firewall rules and NAT, if you have any questions, let me know and I’ll try to help.
