In this post I’m going to show how to go through the Kubernetes Hello World Walkthrough but using Rancher instead of Google’s Cloud Platform. One of the reasons I wanted to install Kubernetes on my own resources instead of in the cloud is so that I don’t have to pay additional costs while I’m experimenting/learning.
You’ll need to have done the following before proceeding:
- Installed Rancher.
- Installed Kubernetes on Rancher.
- (Optional) Created a Docker Hub account.
Create the Docker image
I’m going to build the Docker image on my Rancher machine (a VM), but you can build it anywhere. If you decide to build the Docker image somewhere other than the Rancher machine, you’ll need to push your image up to Docker Hub. You may be able to add a container registry to Rancher, but I haven’t explored that. You can also use my image.
Run the following on the Rancher machine.
mkdir hello-node
cd hello-node
Create a file named Dockerfile with the following contents:
FROM node:4.4
EXPOSE 8080
COPY server.js .
CMD node server.js
Create a file named server.js with the following contents:
var http = require(‘http’);
var handleRequest = function(request, response) {
response.writeHead(200);
response.end(“Hello World!”);
}
var www = http.createServer(handleRequest);
www.listen(8080);
Build the Docker image (that’s a period after v1):
docker build -t chrisgreene/hello-node:v1 .
If you need to upload the image to Docker Hub (make sure to change the image name or it will conflict with mine and fail):
docker login
docker push
Create the deployment
Now that we have our Docker image ready to go we can create the deployment. To do so:
- Make sure you’re in the Kubernetes (k8s) environment.
- Select Kubernetes
- Select Kubectl
- You’ll now have a shell to enter commands

Enter the following command (replace the image name if you’re using your own):
kubectl run hello-node –image=chrisgreene/hello-node:v1 –port=8080
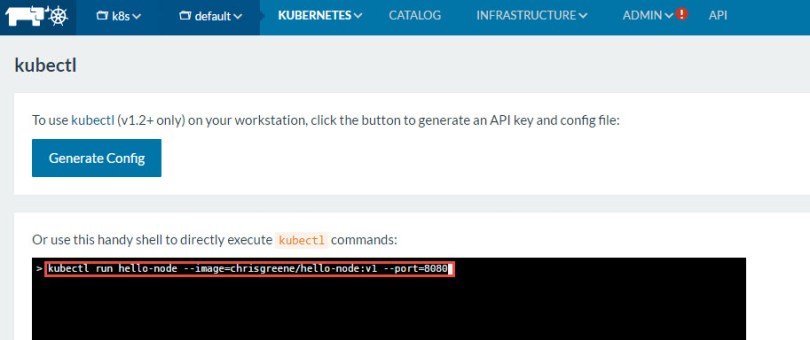
If the deployment was successfully created, you’ll see the following:

Verify our deployment:

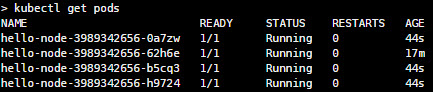
If we get all of the pods, we will see the hello-node pod:

You can also view the replica sets by running kubectl get rs.
Select Infrastructure > Containers and you’ll see the hello-node containers:

Expose the Node.js service to the outside
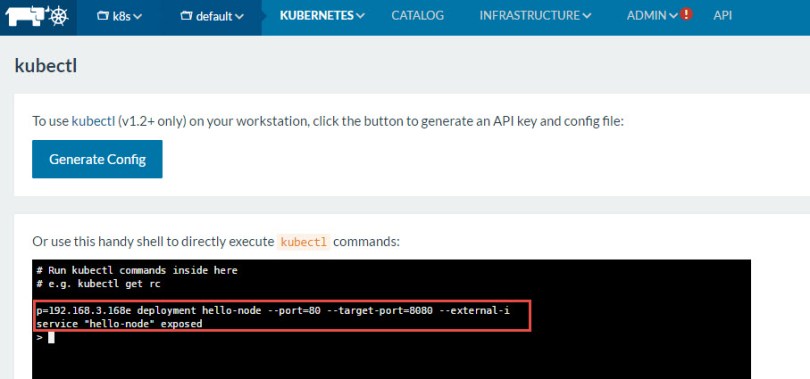
In order to reach the Node.js service, we need to expose it. We can do this with the following command:
kubectl expose deployment hello-node –port=80 –target-port=8080 –external-ip=192.168.3.168
192.168.3.168 is the IP of my Rancher machine. You’ll most likely need to change this. If you’re copy and pasting from this example, make sure there are two dashes in front of port, target-port and external-ip. Sometimes those get lost during copy/paste and the command won’t work.
Let’s verify our service:

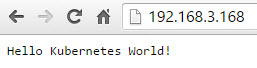
Now I can access my Node.js app:
Scale the app
Let’s scale the app to 4 replicas instead of one:

Verify that we now have 4 pods:
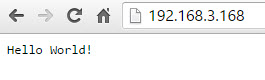
Upgrade the app
I’m not going to show the steps to upgrade the app, but they are exactly as described in Roll out an upgrade to your website.
I performed the steps and was able to see the new site: